Directions: (I’m copying this from the TLC site as it seems a bit tricky getting there the 1st time!)
From Pittsboro: Go south on US 15-501 for 8 miles from the Chatham County Courthouse traffic circle. Turn left on River Fork Road (SR 1958), the first left after crossing the Rocky River bridge. On River Fork Road, turn right immediately and proceed for 1.7 miles. Turn right at the stop sign and continue 0.5 miles to the TLC Preserve sign. Turn left and drive about 1/8 mile to the parking area on your right. More parking is available through the small lot, under the powerline.
Distance: ~ 3 miles (if you do all the trails)
Difficulty: moderate (a couple steep climbs but relatively short)
Description: Quite secluded — the drive back seems like you are going quite a ways in. Gorgeous land and it is cool to see where the two rivers merge — especially when water is flowing fast after a good rain, but then it will be muddy. Bugs can be bad in the summer. There are different trails and if you want to do them all, you have to double back on a few of them.
Map of trails from TLC (click for larger image):
GPS track:
In order to get all the trails on the GPS track, I had to double back a few times (e.g. the Comet Trail, part of the White Pines Trail).
Photos:
When you park at the trail heads you have a couple options on which way to go. This shows the marquee and the start of the White Pines Trail, and a down tree blocking the start of one of the trails. But it is easy to get around. There are normally a good supply of information booklets in the marquee, and they have the map included above…
If you take the School Kids “loop” near the bottom and by the Rocky River, you come up on an old cable bridge… not much to see except one of the cables and the river these days.
The benches at the David Howells memorial… This site sits high and sort of overlooks the Rocky, but even in the fall and winter the trees are pretty dense so the view is limited.
Lots of vernal pools depending on the season and how much rain we’ve had…
Here is the other option you have at the start. This is really the Gilbert Yager Trail, not the River trail. The sign is saying the River trail is 1 mile away. I did not get that the 1st time I read it.
You can park at US 64 and the Haw River “intersection” on the West side of the river, and hike north or south; or park at the Robeson Creek Canoe Access point off Hanks Chapel Road and hike north.
Level: moderate to strenuous depending on water conditions and how far off trail/river you have to go… South of 64 there are some “cliffs” you may have to climb up and over depending on route selection
Description: unofficial and unmaintained, or at best “semi” maintained by the boaters and fishermen that use this section… (And you will occasionally run in to hikers, but not often in my experience.) No markers on the trails, and while most sections are obvious, some are not. Just keep the river on the East and don’t wander too far west and you should not get lost.
North and South (partial) GPS markers:
Here are GPS tracks on both the north and south side. The south side is only a partial as the water level was too high (10 feet, just under flood level, on the USGS Bynum Gauge) to make it all the way to Gabriel’s Bend. (Well, at least with the two kids with me!)
(North zoomed in)
A bit more detail on the north end… There are some sections that may be a bit of a bushwhack depending on conditions. Just keep the river on the east side of you and you can’t get lost. I.e. don’t wander too far to the west. I think I could make it all the way to 15/501 on this path and hope to try it some day. There is a split just north of 64 that leads you up and over/around a section of the river that will not be passible in high water (perhaps 6-7 feet on the gauge). I went both ways so both routes would be visible in the GPS track, but again, the lower section is much less defined and at points you are on rocks on the edge of the river.
South (partial) zoomed in…
Again, could not make it all the way to US 64 this day, but I will update this the next time I make the whole route. Normally when you park at Robeson creek you do not have to head as far away from the river as the image below shows, but the water was very high this day, just under 11 feet or flood level on the Bynum Gauge. (Of course the water level is not shown in this satellite image)… When the water is is high, the section near the parking lot is under water. Due to the high water there was a lot of off trail hiking as you can tell from the two slightly different routes on the out and back.
Photos (North of 64):
Some of the sites you will see on
If you choose to go the “low” route, or the route closer to the river than up and over, it becomes much less of a trail, and in some places more of a bushwhack and/or scramble. If the water is high, this section would not be passible. Check the USGS Bynum Guage. Anything over 6 ft and your probably will need to swim it. I.e. don’t do it!
This is what I call a “wash up,” which is where all the trash that comes down river on a big rain ends up. I’d like to go back and clean this up one day.
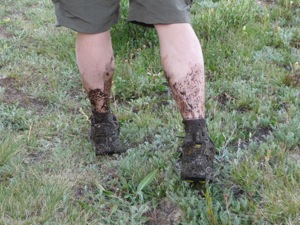
This is what I wore out when I took the GPS on the north section.. It was a bit muddy!
Photos (south of 64):
South of 64 is the most popular white water rafting section of the Haw, though you will see some on the section north of the river as well.
Location: The Jordan Lake New Hope Park can be reached via US 1, exit 81 at Pea Ridge road (head west after you exit) or via US 64 on the east side of the lake, by heading south on Beaver Creek and then taking a right on to Pea Ridge. Pass through the gate and take the 1st right towards the boat ramp. The trail head is at the beginning of the parking area on the far left.
Distance: 3-6 miles (two different loops, plus the out and backs to the primitive camp sites)
Difficulty: moderate to strenuous (there are a couple tough hills for this area, that make it seem a bit mountainous)
(The GPS tracker I am using tends to underestimate mileage on these kinds of trails, so the mileage on the map above is slightly off.)
Description: New Hope is my favorite hiking destination in Chatham County. It can be quite mountainous and is often secluded — it is rare that I see more than 1 or 2 other people out there, and typically I see none. (Though that can be said for many of the trails I plan on reviewing!)
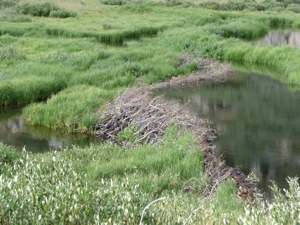
About 100 meters from the trail head the trail splits. If you stay left, you start off on a tough little hill before settling into some easier running. After crossing a couple of gravel roads, you can take the out and back to primitive camp site B, or continue on. If you stay right at the beginning, you reach an inlet where you sometimes can catch beavers playing — look closely and you will see their den. Keep going and you will find a short 50 meter branch to a bench that overlooks the largest part of Jordan Lake. You can see all the boaters here on nice days.
The two trails form a bit of a figure 8, so whichever way you go, there is an option near the middle to cut back to the trail head.
If you take the trail up to primitive camp site B you reach a parking lot. From there you can get in another 1000 meters or so by running all the way down to the lastcamp site (where I have backpacked to before). I don’t have that shown on the GPS track but will add it when I have the time to complete the entire trail.
Note: This area has an “unofficial” but maintained grassy/gravel road to the Jordan Lake dam area. As you go up the gravel roads towards camp site B you can follow the grassy road towards the dam. And from there it loops back out towards Pea Ridge Road. I’ll include another map that shows that road, and while it doesn’t show an actual connection to the dam area, it would not be hard to trek it… This may get a bit long for most people for a hike but I have ridden a mountain bike on it.
Photos:
Just one, of the marque at the trail head showing the map:
Location: The Jordan Lake Vista Point trails are located in the Vista Point recreation area of Jordan Lake. On US 64 on the West side of the lake, turn South on to North Peak Ridge Road and drive approximately 3 miles to the park entrance.
Distance: blue loop: ~2.5 miles red loop: ~3 miles
Don’t go when: If the water levels are above 220 you will have to bushwhack some sections of both trails…
Difficulty: Easy
(The GPS tracker I am using tends to underestimate mileage on these kinds of trails, so the mileage on the map above is slightly off.)
Description: There are two loops, a red (~3 miles) and blue (~2.5 miles), which can easily be combined. The terrain in this area of Jordan Lake is quite flat with less than 70 feet of elevation difference throughout the entire trail system.
If you park at the ranger’s office just outside the gate, you can start on the blue trail, which loops around to an old tobacco barn before heading towards the group camp area. Just before the camp area is a large grass field. It is best to hike around this if the grass has not been mowed recently — it can be thick and slow going, and the chiggers are bad in the spring and summer. Just before the grass field the trail is a bit hard to follow as a few blazes are missing, but you can just keep the road on your left and the lake on your right and look towards the field. At the group camp area you have exit the camp area gate and cross the road to hit the red trail.
The red trail is about 3 miles long and first runs out along a long peninsula with views of the wide open area of Jordan Lake, eventually loops near the RV camp sites, before hitting one of the shelters. From the Shelter the trail either heads down to the beach, or you can cut through the parking lot, cross the road, head back towards the park entrance, and pick up the blue loop again at the group camp site. It actually continues when you cross the road but this section is not really maintained and doesn’t really go anywhere except back to the group camp area. I normally just take the road back to the came area instead.
Photos:
(I’ll try to add more as I go out each time.)
The trail head for the blue trail at the ranger’s office.
Over the coming months, I’ll be working on a blog series of all the trails in Chatham County (at least the ones I know about!). I’ll be going out to hike or, more likely, run the trails, tracking them on a GPS, taking some pictures, and giving some comments. This post will be updated as I go and serve as a “home page” for this series.
With a week long vacation to Colorado, I was excited to get another 14er or two under my belt. Not like I’ve done many — just the two last year — but they are a lot of fun and quite a challenge. My friend Ben had to be in Leadville later in the day (to pace someone in the Leadville 100, but he still wanted to hike with us!), so we looked for a peak in that area. It also turned out that my other friends Mike and Ethan, with whom I often hike the AT, were in the area as well– Mike has moved out there for a year to teach and Ethan was there for work. Together we decided to hike “The Quad,” a series of four 14ers you can hit in one go — Democrat, Cameron, Lincoln, and Bross.
As always, 14ers.com has the definitive guide with photos, routes, maps, and all kinds of other useful info here.
Ethan and I stayed at Mike’s house the night before. We awoke around 3:45 a.m. and hit the road so we could meet two guys guys in Colorado Springs, and head out to Kite Lake. Ben and Nicholas had left Highlands Ranch around 1:30 a.m. to go to the Leadville 100 race start at 4:00 a.m. He was to meet us at Kite Lake around 6:30, though he ended up not getting there until closer to 7. I had sent the other guys on as I figured we might catch them, since Ben would have to go fast to get back to the race.
There was quite a crowd at the Lake, and the route would be fairly crowded all day. I guess with the beautiful weather and the day being Saturday, lots of people were out.
I used the nifty RunKeeper app for the iPhone to track the route via GPS. I was out about 5 hours and this pretty much drained the battery, but it’s great to see the exact route taken and the profile/speed info.
And the profile:/speed info… That blip in speed around mile 5 is probably a mistake — RunKeeper has a GPS filter but sometimes things slip through. Either that or I decided to run a quater mile for fun. 🙂
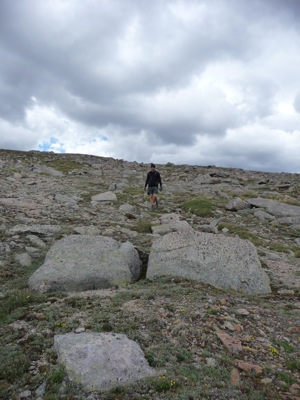
From Kite Lake, Democrat doesn’t look too intimidating, but it was going to be quite a climb — 2000 feet in 2 miles:
Here is a view looking back towards the lake, after maybe the 1st 700-800 feet of elevation gain. If you look closely you can see a lot of cars in the parking area, but the road up to the lake was really full too. And you can see a lot of hikers on the trail below. There were probably twice that many above us already!
As Ben, Nicholas, and I were on the final approach to the summit of Democrat, we passed the other guys on the way down. The first shot shows how rocky the “trail” was, while the second shows the final climb.
The three of us on top:
I normally take a video on the top of each peak, and I did this time as well, but the peaks were all so crowded, with many folks on their cell phones and stuff like that, that it isn’t worth posting them.
After we descended to the saddle between Democrat and Cameron, Ben and Nicholas decided they better not push it and headed back to Leadville. With Ben having to pace someone later in the day, it was probably a wise decision, as the rest of the day was not easy.
This shot shows the long steady climb up Cameron… Towards the top of this, I was definitely feeling it! Though the rest of the day I felt pretty strong. I met the other guys at the top of Cameron.
Me on top of Cameron:
After Cameron it was a short hike down and up to Lincoln… The remaining 5 of us on top of Lincoln:
I was itching to keep moving (didn’t want to get cold) so I hiked up to the top of Bross by myself. It was really flat up there and again there were a lot of people. I started to hike back down as there was a split in the trail I could take to go back to the lake, but I met the other guys before that split, so hiked back up again, and then headed on down. There were sections of the downhill that were a bit hairy — super steep and mostly scree — so I took it pretty slowly in most places. The next few shots show the scree, steepness (though pictures never do justice!), and some old abandoned mines.
From the end of the trail, this is looking back the way we just descended:
RunKeeper shows it took me about 5 hours with an average pace of 1.5 miles per hour. While that seems slow, you have to remember how steep it is both on the way up and the way down, and that most of the hike is above 13,500. And I did take time at each peak to hang out (well, just for a few minutes).
It was a relatively easy way to bag four 14ers in one go, though no 14er is truly easy.
I met Ethan and Mike at Fontana Dam on Tuesday night. I arrived around 5:30 p.m. and checked out the shelter, affectionately known as the Fontana Hilton due to toilets and showers near by, and decided it would be a nice place to stay the night before we were going to start the trek from Rock Gap to the dam. The shelter sleeps 26, and there was plenty of space. They arrived a little after 10 p.m., and of course all the other hikers were already asleep so they crept into the shelter as quitely as possible. We awoke a few minutes before 6 a.m. and were on the road right away, since we had a 90 minute drive to the start.
Here is a small map of the area… We started just south of US 64, and ended up at Fontana Dam, right where the “green” for Smoky Mountain National Park is.
Here are the elevation profiles for the section we hiked. We started near mile marker 103, at the gap before Winding Stair. The hike out of the NOC near mile 104 was quite the climb! About 3300 feet to the top at Cheoh Bald, though we stopped at the shelter at Sassafras near 2900′ of climbing.
And we stopped at Fontana Dam, so next time we start it will be quite a climb up. I am actually thinking of “fastpacking” the Smokies in one-go. It has been done as low as 17.5 hours, though most people are in the 22-23 hour range. I think I would shoot for less than 30 hours! Anyone game? 🙂
Day 1: Rock Gap to Cold Spring Shelter, 19.5 miles
We started just after 9 a.m. and hiked pretty hard. We wanted to make good miles the 1st 2 days so we would have a short hike out on Day 4. We got to the shelter, but it was very old and only slept 6. We set up the tent on the ridge line above the shelter with the plan to have Mike and myself in the tent, and Ethan in the Shelter. But apparently around 9 or 9:30 some younger guys got to the shelter, made their way into tight quarters, made a lot of noise, etc., so Ethan came up to the tent.
Day 2: Cold Spring Shelter to Sassafras Shelter, 18.4 miles
We again pushed hard so that day 4 could be easy. Sassafras shelter was packed, so we found a site for the tent and set it up. There was no level ground so we adjusted a few times, but at the end we still had a good 5″ drop from head to toe, which I think adversely affected my leg and foot recovery! One interesting point while here. One guy, who I never actually saw, wandered off into the woods and was killing it on his harmonica and blues singing. He was really good!
Day 3: Sassafras Shelter to Cable Gap Shelter, 15.2 miles
Again pushed hard to get 15.2 miles in. I was shooting to hold a 3.0 mph pace and made it in around 2.9, not including a 1 hour lunch stop at Brown Fork Shelter. Many folks at Sassafras had said they were going to try to make these 15 miles, but after hiking it and arriving a little before 5 p.m. to find the shelter empty, I thought not everyone could make it since it was a pretty tough hike with a couple killer climbs. I was surprised by the number of folks that did make it, but not everyone did. While sitting around the camp fire (only one of the trip!), we were talking to one 69 year old and his son. They had made it from Sassafras, so I was impressed with the older gentleman’s stamina and endurance, because it was tough. Anyway, the son was someone that worked at IBM in Tampa where I had worked back in the 90’s, and we knew each other’s names and had probably worked together on a few things, but had never met face to face. Small world!Here is a link to his blog.
Day 4: Cable Gap to Fontana Dam, 7.3 miles
I finally made the 3.0 mph mark I was shooting for! We got to the dam a little before 10, showered up, and drove back to the car at Rock Gap.
All in all a great trip, though this is the 1st without any kind of major “story” to tell. Like the blizzard we got caught in in 2005 — in April, in NC. Or the many equipment failures we had last year. Uneventful, but a great time. Can’t wait to continue on towards Maine!
Here are a few photos, with a link to the full photo album below:
Quote of the trip: On the last night at Cable Gap, we had been there fore a few hours and a couple came in really fast around 8:30 p.m. When they found the shelter was full, they sad they had no tents so they were going to keep going. I assume they at least had a tarp or something along those lines. They treated water and looked at the maps for where they wanted to go. We asked how far they had come, and they said Wesser, which is the NOC, so they had come about 25 miles and were now planning on at least 3 more. We then found they had made it to this point, about 150 miles into the trail, in just 7 days, including a “Zero” where they rested up!!! That is just insane fast. They explained they had to make it to Maine in 90 days to get a free ride home. These two looked very energetic for having done so many miles already. I asked what they had done to get in shape. The girl, with orange and pink hair, said: “I just skate boarded. Like 8 hours a day. I’m addicted! I guess all that moving like this did it!” where she demonstrated a kind of frog squat. That was NOT an answer I ever expected! I wish I had gotten their trail names so I could follow them to see how they hold up at that kind of pace.
Last week I was supposed to do around 60 miles on the Appalachian Trail, from Wallace Gap to Fontana Dam. But my friend Mike cut his hand really bad and decided to cancel. Which was the right choice considering where the cut was (between the index finger and thumb on the palm side), and how wet it was going to be — it would have been hard to keep the cut clean in those conditions. We have rescheduled that same section for May.
But I was really itching to get out! At first I was looking at options on the AT, but going solo is a pain for a one way trip, with the need to arrange shuttles or a pickup. Plus the weather was looking really bad all week. Eventually I settled on an overnight solo trek in Uhwarrie National Forrest. I waited until Sunday to leave — the 1st sunny day after 4 days of rain and storms!
While Uhwarrie is not scenic like many mountain trails, it is hilly (not mountainous), rugged, and I can be at the trailhead within 90 minutes of leaving my house. I had been on some northern portions of the trail and within the park a few years ago when training for a Rogaine, but I started this hike at the southern terminus on highway 24/27, which was new to me.
The 1st day I hiked about 8 hours, the 1st 6.5 or so all on the Uhwarrie National Trail. I reached a split for West Morris Mountain Campground, but decided to keep going on the UNT for another 45 minutes or so before turning back and heading to the campground. The campground was not much — just a few car camping sites and no water, so I decided to head back towards the trail to some primitive sites I had seen along the UNT. This is when a stray dog started following me. I tried to scare it away a few times, but she would not leave me alone. She followed me the next couple hours until I set up camp. I finally broke down and gave her some crackers.
I did not sleep great. I never seem to sleep that well the 1st night out, and here I was solo, in the middle of the woods, with a strange dog outside my tent. In some ways the dog was comforting — hopefully she would bark if anything snuck up. 🙂 It also got pretty cold — about 45F in the tent at one point. I had my 20F bag around me, but still got a little chilly until I put on my fleece and socks.
I woke up in the morning, made my coffee and oatmeal, packed up, and headed back towards the car. I opted to take Dutchman’s Creek Trail the last 5.5 miles instead of staying on the UNT the whole way. The dog followed me the whole way, so all told in the 2 days, she hiked with me around 15-18 miles! When I got to the trail head I called the rangers office about the dog, but was told they would call animal control. I then called a local vet, and they were able to scan for a microchip, but no luck. I called a local animal rescue place, but they were full. So I ended up taking “Uhwarrie” home, and for now, we have 3 dogs! We hope to find a home for her, though.
Pictures below.
First a map of the park. I parked at the “P”‘ on the bottom, on 24/27 and hiked north a couple miles past West Morris Mtn Camp ground (not quite to 1134). There is an annual trail run of 8, 20, and 40, and the 40 starts at 1306. I would have liked to get all the way to that road so I could have seen the entire course, but that was too far to go in the time I had! I can say that after hiking the majority of the trail, I am impressed with those that run the 40 mile. It is a rugged, hilly course to say the least! I think I will try the 20 miler next year if I can get in — the race always fills up really fast!
As soon as I started, I knew it was going to be mucky… Four days of rain will do that, so many of the low sections of the trail looked like this:
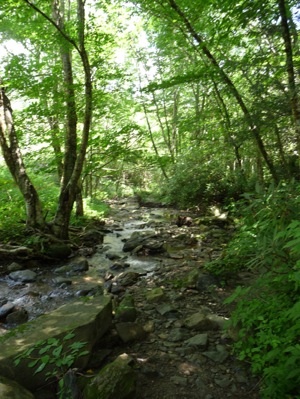
While not scenic in terms of mountain vistas, there were some nice streams:
I also discovered there are very few bridges on the trail. There are many stream crossing that look like this… Many had rocks or logs you could use, but this one did not.
I stopped here on day 1 for a late snack, and thought about coming back to camp. The site sits between two running streams and was pretty nice.. But that didn’t work out and I camped further out.
Another stream shot…
A cool rock formation.
A bridge! There were only 2 or 3 on the whole trail, while there were many many stream crossings!
Here is where I set up camp. When I opened my pack against that tree where the poles are, when I first arrived, somehow my coffee filter “jumped” out! There are not many gear items that I would jump into a cold water stream and run after, but the coffee filter is one of them. I was in crocs running down the stream chasing my filter. I’m sure it would have been comical if anyone had been there to see, but this area was deserted.
Another example of a stream crossing — complete with a “natural” bridge.
Umm, can you make sense of this sign???
And here is “Uhwarrie,” the dog that followed me home:
When we decided to head to Colorado to visit Ben and Allison, I knew I wanted to attempt a 14,000 summit. The highest I had ever hiked before was to 12,000. Luckily, Ben was up for it too. We decided to wait a few days after arriving so I could acclimate to the altitude and get a few workouts in and short hikes in with the family. He had me running at 6,000 feet a few hours after we arrived!
We had looked through 14ers.com to decide on which ones were close enough and interesting enough to attempt. At first we looked at Grays and Torreys but I heard that was really busy and fairly tame. We also looked at Longs but that was a bit far away.
We decided on Bierstadt (14,060′), even though Ben had just done it recently, because if I found it easy enough to get to the top there, we could keep going along the Sawtooth Ridge and make it to Mt. Evans (14,264′), and bag two 14ers in one hike.
The definitive route guide for this hike is here, so I suggest going there for a more detailed description of the route. The site 14ers.com has excellent photos with the routes marked on them. I wish we had taken some of the photos with us as it would have helped us make better decisions on which routes to follow.
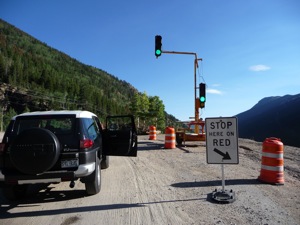
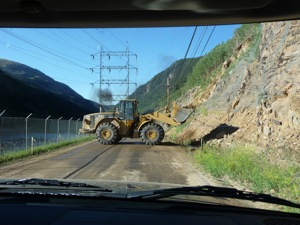
We got a bit later start from the house than we wanted, and then were held up by construction on the road from Georgetown to Guanella Pass. (Yes, I know the light is green in the picture, but it was red for at least five minutes and changed to green right after we had yelled down to some construction workers about it!).
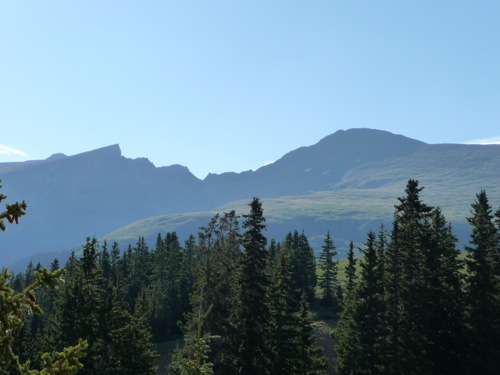
This is a view from the parking lot of Mt. Bierstadt on the right, and the Sawtooth ridge on the left. Evans is not visible here, but is behind the Sawtooth.
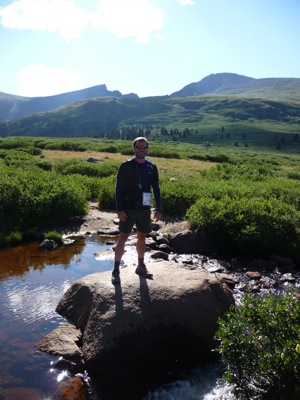
The hike starts off through a flat land that is fairly marshy, so they’ve built a board walk. Here is me on a rock in the middle of a stream crossing, with Bierstadt and Sawtooth in the background:
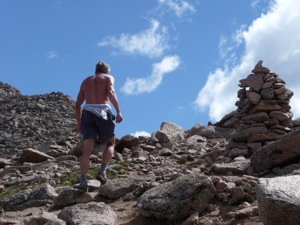
Near the top of Bierstadt, we were passed by this madman — no shirt, no water, no food. Most everyone else had on hats, gloves, and at least an outer shell! We ended up talking to to him for a bit when he was coming down, and he has climbed all 54 14ers in CO and has over 300 14er ascents! He just does it for fun — not training as an ultra runner or anything like that.
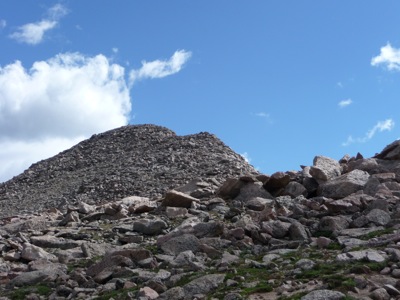
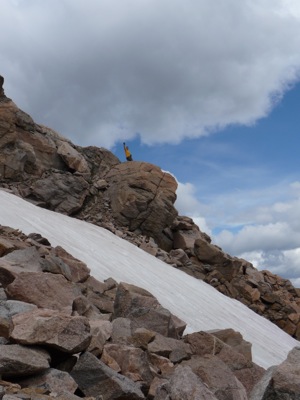
Bierstadt looks like a huge pile of rocks at the top — and it is. You can’t see the people in this downsized image, but they are tiny — so there is still a ways to go to the top from here!
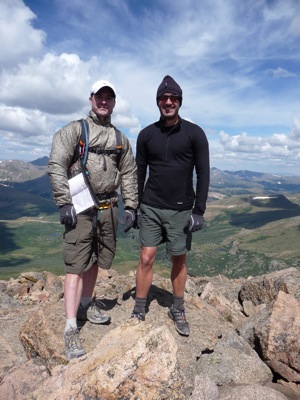
And here we are on top — what a view!
Top of Mt. Bierstadt
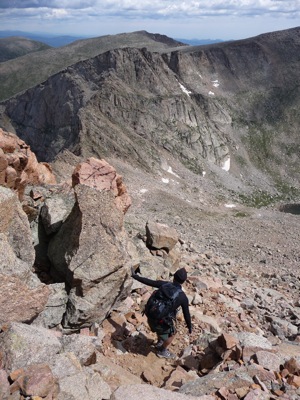
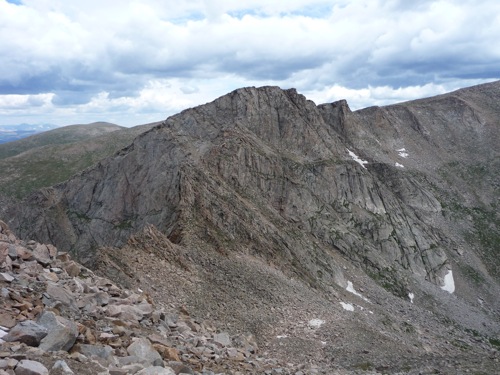
If you watched the video, you heard that we still weren’t sure if we were going to go on. Physically I felt fine — no tiredness from the climb and no feeling effects of altitude yet, so that was not the problem . The problem was that the climb down from Bierstadt and then the Sawtooth Ridge looked a bit difficult from where we were. But once we started down, to “scout it,” we eventually reached a point of no return! Photos never do justice to the steepness, but this is me climbing down from Bierstadt towards Sawtooth, and there is Ben way up high. He chose a higher route than I did.
Here is a shot of the Sawtooth ridgeline… We eneded up going down pretty low by the three snow patches, before climbing back up through the notch to the far side. There were two people coming down behind us that we could see took the ridge line as the route an 14ers said to do. There were lots of cairns showing both routes, so you just need to make a decision and go with it. I think the way down was fairly fast for us, and then the climb up was not too bad, so I don’t know if it makes that much difference.
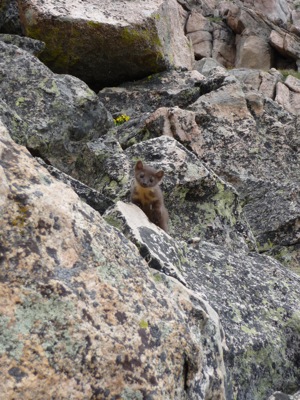
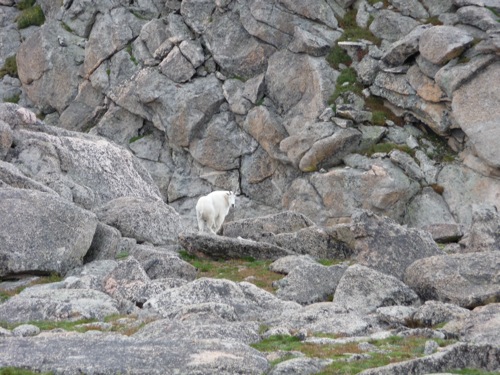
We saw a ton of wildlife on this hike — ealges, marmuts, chipmunks, a mountain goat, beavers, etc. Here are a couple shots:
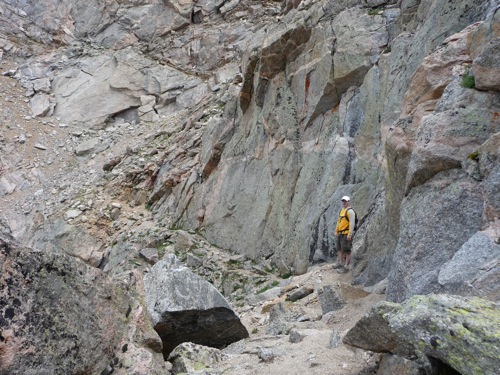
Once we climbed up through the notch to the backside of Sawtooth, it got a little hairy. I was slightly dizzy from the altitude, and it started to snow and get windy. Plus, the path up the backside is a lot of scree, and the space between the rock wall on your right and the 1000 foot drop on your left can be as small as a few feet! (Well, I don’t know for sure if it is 1000′ down, but it sure looks like a long ways, and after a 100 feet or so, it doesn’t really matter!) I should note that the folks we talked to and the 14ers web page all say the pictures make this section look worse than it is, and that is probably the case. While anyone with a fear of heights should not do this section, it never seemed that bad. I was mostly worried about my dizzyness and the snow!
Here is Ben at one point where the drop is just in front of him.
Once you round the sawtooth, you head up the tundra to find the trail going to Evans. I don’t have any photos from there as I was pretty hurting altitude wise at that time, and there really wasn’t much to see anyway. (Well, there are of course beautiful views all around, but not really different from what we had already seen.)
Top of Mt. Evans
While on top of Evans, the two hikers that had come behind us on Sawtooth came up. Turns out it was two women, and they had a car close by. I was sorely tempted to hike down with them and get a ride back towards our car, but I gave myself some time to sit and eat, and then decided we could make it back on foot. The snow had stopped and the weather had cleared, though mountain weather can change fast, we felt pretty sure we could make it back to the car without any problems.
One note is that there is a road to the top of Mt. Evans, so there are a lot of folks up there that drove. I normally am not crazy about such places, but in this case, there are only two out of 54 14ers that have roads to the top, so that is not too bad.
On the way back we came across a mountain goat — he wouldn’t let us get too close:
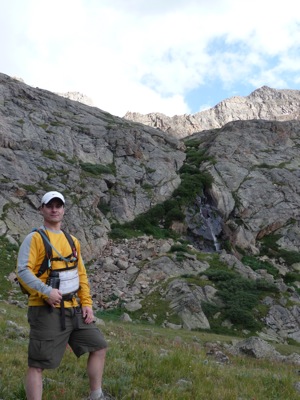
We came down the tundra and followed the water to the gully, where the route told us there was a class 2 scramble down. This section was fairly steep and has a ton of scree, so each of us had a few slides and falls. One thing that is funny here is that when we started the hike and were looking at the possible return paths the 14ers.com route was describing, I pointed at one and said no way, too steep. Turns out that was the one we came down! At the bottom there was a gorgeous waterfall, and a lady had solo hiked in and set up camp down there. She was off in the distance a bit so we didn’t disturb her — but what an awesome place to camp.
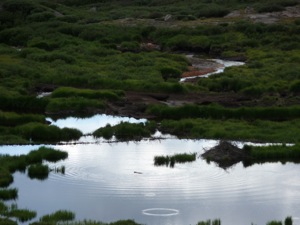
As we went further down, we came across beaver dams and even saw a beaver come out. The picture on the left has a beaver floating in the water (you have to look closely).
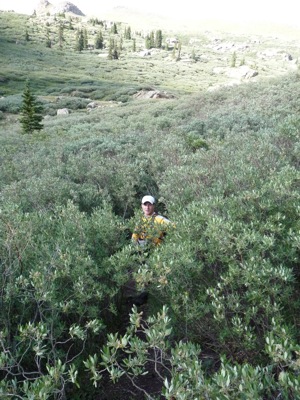
Just below the beaver dams, there is no set trail — it is willows and a lot of muck, and many self made paths trying to find ways around the muck. This section took us much longer than we thought. There were some sections where the willows were very thick and/or over our heads, and some of the muck was pretty deep.
We finally made it back to the car, where my altitude headache really started to make itself known!
There was an older man waiting for another hiker to come down, and he asked if we had seen him. We had in fact met him when we were on our way towards Mt. Evans and he was heading towards Sawtooth and Bierstadt in the opposite direction that we had come. We guessed it would have taken him longer to get to the parking lot at Guenalla Pass than it did us — at least we hope so! We had to leave before we ever found out.
We drove down and met Allison, Kelly, and all the kids in Idaho Springs and ate pizza at BeaoJo’s.
All in all, a great hike. I don’t know that I would do it again — mainly because there are so many other 14ers in CO that I would like to do and not that the Sawtooth section was that crazy. While it was a bit hairier than any hike I have done in the past – including the Grandfather Mountain Trail and even the class 2 scramble and 400 meter cable run on Half Dome, it wasn’t that bad. Definitely some class 3 in there, though, but mostly class 2.
Ever since we started going up to the Seven Devils/Banner Elk area a couple of years ago, we have passed by the trail head for the Grandfather Mountain Profile Trail, and I have been waiting for my chance to go. The reviews online were a little confusing — one stating the trail was a little under 6 miles round trip, another stating it was over 11!
Well, we were up there again recently, and I got my chance. I had Kelly and the kids drop me off at the base of the trail. I knew I needed a permit, but I thought I might be able to get one at the base, and before I realized I could not, Kelly had driven off! The permits were just .7 miles up the road at an Exxon, so I began to run to it. About 1/2 way there, a lady I had seen and talked to at the based yelled from her car if I wanted a ride. It was kind of a dangerous place to stop, so I told her go up ahead of me to a pull out. By the time I got to her, it was only another couple tenths of a mile to the Exxon, but it was nice not to have to run all of the hill. I bought my permit for $5, got a map, and ran back to the start (all down-hill).
When most hikes are free, it may seem odd to pay $5 for the privilege. The cost goes into trail maintenance, and the trail is all on private property so there are no government funds like at state owned land. I can say that if all trails were this well maintained, I’d be happy to pay! There was almost no trash (I picked up the one piece I found), and the amount of work put into some of the stone work for stairs, erosion control, etc., was really amazing. Some of the stones that have been moved were just huge!
With map in hand, I realized why there was confusion in the trail distances… The “profile” trail is almost 3 miles up to the rest of the trail system on Grandfather Mountain, thus just under 6 miles round trip. Depending on what trails you take at the top, you can easily get to 12 miles or more. Looking at the map and all the trails, I had to make some decisions due to limited time. I decided to really push it and go for the swinging bridge, which was about 5 miles away. I had already gone about 1.5 miles to get my permit, and only had 4-5 hours total! I ended up running any of the flat sections or safe sections that I could. This was all good training for a 14,000-er attempt I hope to do in about 10 days in Colorado. (Though I am worried about how different the air at 14,000 will be than the 5500 most of this trail is at, it is the best training I could get here in NC.)
The beginning of the hike runs along highway 105 for a bit, and along a beautiful mountain stream.
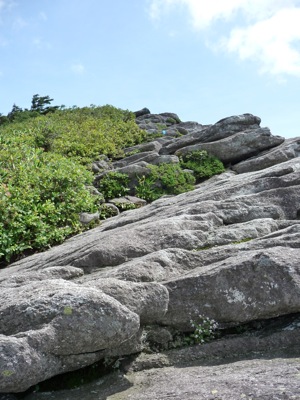
Once you turn up, you really go up — about 1700 feet in 2 miles, and parts of the trail are all rock:
That photo doesn’t do justice to the steepness — I guess they never do. And those rocks were really slippery, especially on the way down. I had forgotten my trekking polls, which made it that much worse.
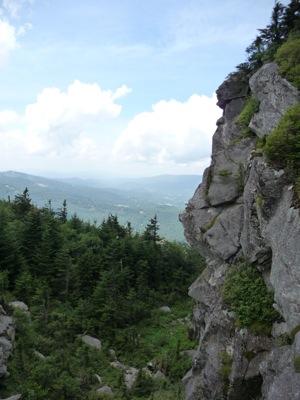
The hike became spectacular once getting off the profile trail, and hiking southwest towards the swinging bridge… About a half a mile or so on Grandfather Trail, and all of a sudden you are on top of all the rock formations that make Grandfather Mountain look like it does from the bottom. And the trail is literally on the ridge line, sometimes just feet from hundred foot (plus!) drops. There are cable runs, wooden ladders, and tunnels, as you can see in the photos below. This part of the trail had the most amazing views and rock formations I have seen since I hiked in Yosemite!
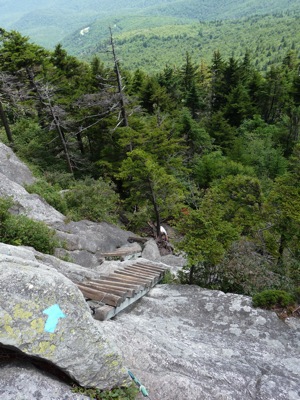
Yes, this is the trail… A ladder straight down, and then rocks (almost) straight down:
And then up a ridge:
And more down:
On the way up, there is one point where you can climb a ladder to McCrae Peak at 5939 feet, which has spectacular 360 degree views, where I took this video. The youtube quality is not great so some of the things I try to point out, you can’t really see. Oh, and later on, I found out the road on the backside is the blue ridge parkway.


