Riley’s Frist Backpacking Trip.

I was finally able to take Riley on an over night backpacking trip. We went to a local part of Jordan Lake — New Hope Overlook — that has about 6 miles of hiking trails and 2 primitive camp sites. I had planned on going to site A as it is closest to the water and thought that would keep us more entertained, but the guard told me there were 4 sites taken by a boy scout troop, and 2 other sites taken, so we opted for Site B, where no one had yet reserved a spot.

I picked out all of our gear and food, and then split the load into my pack and Riley’s. She insisted on a couple of small stuffed animals, but beyond that she only had her sleeping bag, sleeping pad, a tiny flashlight, energy bar, and small nalgene. At first I loaded in the tent ground cover (13 oz), cup, and spoon, but she pulled those before we even left. Either way, I ended up carrying her pack about 90% of the time anyway! I have to say, though, that it is mostly due to the pack she was using. It is really a “sleep over” backpack, in that it has a place for a sleeping bag and clothes, but is really meant for the trip from the car to a friend’s house. There is no real support structure to distribute the load, so it was not comfortable for her at all. If she continues to show interest in this, we will look into a kids backpack, but I doubt they make any for someone her age/size!

Here we are at the start of the trail. I took this from behind Riley so you could see her pack. The picture I took from in front is all blurry, or I’d show that too.

I

The guard was quite surprised when I told him we were going to park at the trail head, rather than drive to the camp site parking area. While they call it “hike in” camping, you can actually drive to within a couple hundred yards of where the sites start, and that is what most people do. But we parked at the trail head to make sure it was a real backpack trip. πŸ™‚ From there to area B, is about 1.25 miles, but we actually hiked all the way to end of area B, which is more like 1.75 miles. We didn’t see any other campers on any of the sites on the way to there, so it looked like we had the whole place to ourselves! It was only about 5 p.m. though, so more could have come in. Turns out when we walked out the next day we did see two sites with tents on them, but it FELT like we had it all to ourselves while we were there.

We also discovered that the last site in area B (site 15), had some trails down to the lake after all, so we were in luck! When we arrived, we set up the tent and grabbed some fire wood for later, and then we walked down the trails, which kind of disappear after bit into just woods, down to the water. This picture of Riley in front of the tent is blurry, but I wanted to include it since it is the only one we have of it.

Here are a couple shots of the beach area:

While I cooked our dinner (black beans and rice, crackers, cheese) in my Jet Boil stove, I still made a fire and we made smoores (after a 2nd beach trip and sunset).

We retired to the tent around 8:45 or 9 p.m., when it was getting pretty dark and Riley was getting pretty tired. I read a few pages from “Walden” to her, which is really not age appropriate for her yet, but she still had some questions and I tried to point out some interesting points, or explain what Walden was writing about. We then slept as best we could in the tent. The 1st night is never as comfortable as the 2nd — or maybe on the 2nd you are just more tired! — but we made due, and overall Riley did very well. We awoke around 7:15 a.m., had breakfast — coffee for me, hot chocolate for Riley, oatmeal, pop tarts — packed up, and went back to the beach for a little while.

We then hiked out the other part of the loop, which was probably around 2.5 – 3 miles total. I again carried Riley’s pack a fair amount of the way, even though this time I had taken everything out except her sleeping bag. It was still a 3 or 4 lbs pack though, not suited to backpacking, so again understandable. The way back was also longer, but Riley made it through. Here are a few final shots of us on a bench about two-thirds of the way through:

And finally a turtle we found on the trail:

Riley seemed to really enjoy it, though she definitely enjoyed the “camping” part more than the hiking. Hopefully she’ll continue to show interest in both aspects!

AT: Exercises

Ok, last post on my recent AT hike… I promise. πŸ™‚

I wanted to record here a few of the exercises I should have done before we set out. As I was hiking along, I kept thinking of these, and how I would have been better off had I done them. πŸ™‚

  1. Hiking: This is of course obvious, as it is very hard to get into hiking/backpacking shape by doing anything else, though there are other exercises that will clearly help, and I’ll get into those below. Last year we went in June, so I had a couple of months to hike locally, up to 6 miles, usually with one of the kids in the backpack. In fact I remember taking Riley in the backpack for 6 miles, and how heavy she had gotten, and saying it was the last time she was getting a ride. And it was! This year we went in April, and I just had less time in general to get out and hike. And now with the kids the age they are, I can only really hike hard with Reece in the pack or on my own.
  2. Step-ups/step-downs: I had been doing these a lot last year for my knee, and had kind of moved away from them. It was obvious as I hiked how much I missed doing them! After my recent PT visit, these are back on my routine, as it is clear I still have more work to do in that area, especially on the R side, where I am quite weak laterally, and have trouble staying straight on the step down because of that. Much of that lateral weakness is not due to the quads, but the supporting muscles, especially the hip adductors, so I am working on those as well.
  3. Quads: in general, quad exercises like lunges and squats, would have helped.
  4. Tri-ceps: this one may not be intuitive, but I rely heavily on my trekking poles on both the ups and downs. On the downs, it saves my kness. On the ups, I estimate I am taking 15-20% of the weight lifting off of my legs and putting it on my arms, which means I use my tri-ceps heavily! I would lean towards military presses which work not just the tris, but shoulders and chest as well, all in a way that is similar to how I use the poles.
  5. Shoulder shrugs: this is another one that isn’t obvious, but what I found in my adventure racing days is that my shoulders would get extremely sore and tired from the weight of my pack. By bulking up in the traps, it seems to take that load off… I think this is due to both the strength improvements as well as the additional bulk to distribute the load better.
  6. Aerboic exercises: I was definitely in better aerobic shape last year as well. I think some of that has to do with being sick the week prior to this hike. Running and orienteering are both good, but next time I will add both elliptical and stair-master to my routine.
  7. Yoga: Nothing specific about yoga, other than I think it is the best overall exercise you can do, as it works on strength, flexibility, balance, and even cardio if you do a vinyasa/flow based style.

AT: Food

This last trip was my longest yet, and there were no real re-supply stops planned. (We did pass through the Walasi-yi / Mountain Crossing Store at Neels Gap, and I did buy Combos and Fig newtons — two things I had wanted to buy before we started, but Target didn’t have them.) So we had to carry 4.5 days worth of food with us. That is both bulky and weighs a lot!

The 1st and 2nd day, I kept thinking I had way too much food, but by the end of the trip, there was not that much left over, even though we came out in 4 days instead of 4.5…. So I didn’t have as much extra as I thought.

Breakfast:

  • 8 packs of instant oatmeal (I need 2 for breakfast!)
  • 2 packs of pop tarts (pop tarts are snacks too)

Lunch:

  • 4 individual tuna/cracker kits

Snacks (to go with lunch or dinner, or as a real in-between meal snack)

  • small packs of pringles (I love these things and ate them at just about every lunch and dinner, and ran out. Next time I should just bring full size cans)
  • small packs of chips ahoy cookies — a desert after dinner, lunch
  • combos — I still love these
  • fig newtons — yummy
  • cheese – ate with lunch and dinner
  • chocolate covered espresso beans — great lift around 2 or 3 in the afternoon, when we were hitting 13 or 14 miles on the day
  • trail mix — I had two bags and only ate about 1/2 of one of them. I noticed they were 10 oz each! That is a lot of weight to carry and not eat!

Dinner

  • 4 dehydrated meals from Mary Jane — these are very good vegetarian meals!

Drinks

  • water at the springs/streams (filtered with MSR pump filter)
  • heed — I had two zip lock bags, and used it all by the end of the 3rd day
  • coffee for breakfast — don’t leave home without it! πŸ™‚

Supplements

  • energy bars — I had a few more of these than I ate, though I still ate 2 each day
  • tissue rejuvenator – has glucosamine, chondroitin, msm, as well as natural anti-inflammatory herbs such as ginger, tumeric, etc.
  • ibuprofen – started as preventative but I needed it by the end!

What to try/do different next time:

  • perpetuem instead of heed (? – this has a little protein mixed in, where as heed is just carbs and electrolytes)
  • more heed, since I ran out
  • big cans of pringles instead of the snack packs
  • more variety for lunch — maybe peanut butter, honey, crackers, etc.
  • keep a better before and after inventory so I know exactly how much extra I had!

AT: Gear

Here is run-down of gear from my last trip. This should help me next time I pack, to eliminate anything I don’t really need and get my weight down a little more.

  1. Pack – Osprey Atmos 65: This was my 2nd trip with this pack, and I still love it. On the last day, the 20 mile march, I noticed 2 cinches I had not seen on the shoulder strap. When Ethan adjusted them, I felt like my pack was 3 lbs lighter! I am not sure I could use this pack on a long solo hike — it may be a touch small. I was carrying everything I needed myself except a tent. Not sure where I could fit one. Overnight or two nights would be ok. Beyond that, I’m not so sure.
  2. Stove — Jet Boil: This was my 1st trip with this stove, and I loved it. Lightweight and compact… The burner and one fuel canister fit inside the “pot”, and the canister is good for up to 12 liters. We cooked 4-5 cups each day for 4 days, and there still seems to be a fair amount of fuel left.
  3. Lights — I can consolidate here, but I love my lights! My new head light (Christmas) is a Petz Tikka, and is much lighter and more compact than my old Petzl Duo. But I carried 2 little flashlights and a photo micro. I could easily get rid of the 2 flashlights and keep the micro for emergencies, to save a few ounces.
  4. Clothes — I went with 1 short sleeve Icebreaker BodyFit 200, 1 long sleeve bodyfit 200, a mid-weight fleece, one pair of shorts, one pair of hiking pants, one lightweight rain jacket, 3 wool socks, 1 pair of injinj toe socks used as a liner, and two boxer/briefs. The short sleeve icebreaker got some holes in one of the shoulders, maybe due to the pack straps I mentioned above, but I love this material and brand. One of the wool socks was also ice breaker and they did well too. I have yet to find a perfect solution to the boxer/briefs. I went without anything on a couple of long sections and that was sometimes ok, sometimes not. I have some shorts with liners and those have worked well for me in the past, but I did not use them this time. Oh, and one “coolie” that I used to wipe sweat off my face when it was hot, and has a head warmer when it was cold. All in all I was about right on with clothes. I could have used some very light weight fleece or liner gloves on the last morning, when my hands had gotten wet and it had cooled off a lot.
  5. Shoes — Soloman XA Pros… Still happy with trail shoes instead of boots, though I did get two very minor blisters this time. I think where the insole wraps the heel and meets the shoe may have caused them.Β  I normally never get blisters.Β  :-/
  6. Water Filter: My filter is about 10-12 years old and clogged on us on the 4th day. Since we’ve gotten home I’ve cleaned it and scraped the ceramic cartridge, and it is flowing fine. On the trail I saw thru hikers using steri-pens and chemicals. I’m not sure I’m ready for either — I still like the filters. I recently saw a new MSR pump filter that is about 1/2 the size and weight of mine, so now I have filter envy. πŸ™‚
  7. Multi-tool — These are heavy, but it is nice to have some of the items. The knife is a must, though mine is not a locking blade. 😦 It is a leatherman, though I don’t know the exact model. About 1/2 the size of the wave I used to carry.
  8. First Aid kit — I could probably trim a little from this kit, but it is definitely nice to have. Though I don’t always use it, when I do need it, I am glad it is there.
  9. Compass — I was thinking of not taking it this time but there was one place I did need it. It is only a couple of grams, but if I could get more comfortable with my Suunto Watch, which has a compass built in, I should go that route.
  10. Suunto Watch — great for time, altitude, barometer. Need to learn to set the compass.
  11. Leki Trek polls — would never hike with a backpack without polls!
  12. Oregon Research pack bags — lots of little bags to keep things organized — clothes in one bag, food in another (or in the case of this trip, 2 food bags!). Water resistent.
  13. Sleeping bag (20 F) — This seemed warm in the beginning of the nights, but by the end of the nights each night, I needed it! It is a mummy bag, and perhaps my next bag, a 40 or 45F, will be a full zipper so I can use it as a quilt in the summer.
  14. Sleeping pad — I have the 3/4 length thermarest and love it. I think it is 13 oz.
  15. Bag Rain cover — a must.
  16. Cup — I swear I bought a titanium cup last trip, but I could not find it this trip, so I had additional weight. The Jet Boil has a fork and spoon so I no longer carry anything else.
  17. Map Case — I like to wear my map and guide book so I have quick access to it. I guess that is from my adventure racing days, as well as orienteering. I know it is additional weight, but it is worth it to me. I do have a couple of lightweight caribiners that I use on the stretch line that I could perhaps get rid of, but having quick access to move the bag is nice.
  18. Miscellaneous
    1. duct tape: a must, used to try to fix the tent, and used on my feet
    2. emergency poncho: I was going to say I would not take this again, but then on the last day, Ethan needed to cover his bag, so it came in handy.
    3. black plastic garbage bags: another must, useful in a variety of situations like grouping all of our food bags into one bag for hanging at night (to keep the bears away!), trying to fix the holes in the rain fly, etc.
    4. Coffee filter/steeper, fits right in my cup, can’t leave home without it. πŸ™‚
    5. Body Glide — another item to never leave home without, though this trip I only used it once.
    6. Camp Towel — perfect for cleaning off with after a long day — when there is a spring! Or trying to get water out of the tent. :-/

AT: Neels Gap -> Wallace Gap (Old US 64)

Every Appalachian Trail sectional hike seems to have a story. This trip was no different. The story started out to be the miles. We were a little more aggressive this time vs. the last trip, when we arrived at the top of Blood Mountain at mid-afternoon, with our car just 2.5 miles down the hill. So this time we decided to do about 75 miles in 4 1/2 days, but ended up doing 18, 18, 19, and 20 miles in 4 days instead. However, the other story of this trip is equipment failure, including a tent rain fly that had literally disintegrated in a couple places and a water filter that clogged on the last fourth day.

Read on for more!

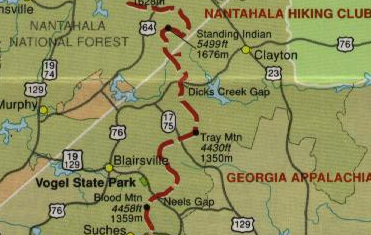
Map: Here is a map showing the part of the trail we hiked. Start was Neels Gap. Finish was past Standing Indian at Wallace Gap, which is not shown on the map. It is between Standing Indian and US 64. You can’t tell from the scale, but it really was 75 miles! πŸ™‚

Pre-Hike: I met Ethan and Mike at the hotel in Helen, Georgia, on Tuesday night. We selected gear to bring, eliminating duplicates, and all the food we would need, and went to bed.

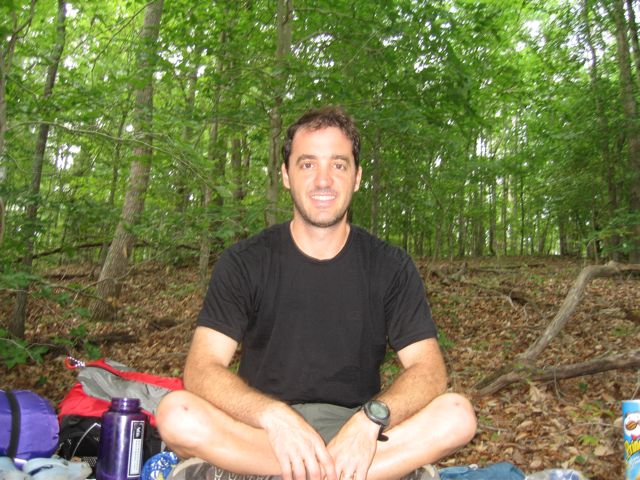
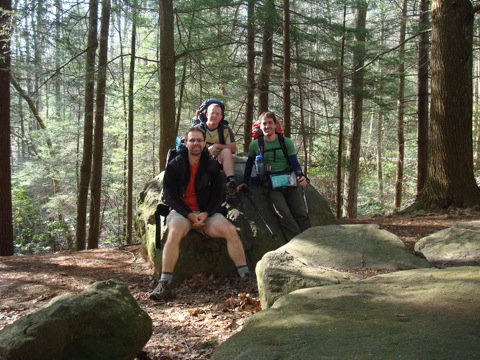
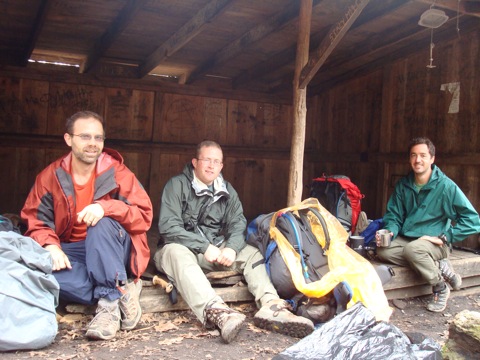
Day 1: The next morning we drove my car the the finish point at Wallace Gap, and then took Ethan’s car to the start at Neels Gap. Here we are at parking area in Neels gap just before we started hiking:

The parking area at Neels Gap is actually not right on the Appalachian Trail. We had a .7 mile hike up to the AT where we had left it last year, and then about a mile hike down to the actual gap, where the Mounting Crossing Store is. We got there and spent a little time walking through the store, and I could not resist getting MORE food — Combos and Fig Newtons, which I was missing in my original purchases. This store is typically the 1st re-stocking ground for thru-hikers, and there were already a few here.

It turns out that we met a lot of thru-hikers on the way, and all of them were very friendly. Most thru-hikers start sometime around 3/15 – 4/15, though there are always some that start early and risk cold and snow in the spring, and some that start later, risking the same in the north in the fall. There were many thru-hikers, and most were doing much less mileage than we were — to save their bodies for the 2100+ more miles to go as they worked their way into good hiking shape. Most go from shelter to shelter, so we found that most shelters were likely to be full. Glad we brought the tent! :-/ One of our past times was guessing which thru-hikers we met actually stood a chance of making it. There were some that had made some very dubious equipment choices, including no tents, no 2nd layers or true water proof layers, too much stuff, etc. There is no real way we’ll ever know if we were right or not, but of all the people we met, I felt truly confident of only 2 or 3 of them! I think the current statistics show that less than 5 or 10 % of people that start actually finish. We saw people so early — for most it was anywhere from 3-10 days into their hikes depending on where we were, that they still had a ton of enthusiasm. It would be interesting to see them in another 100 miles, or after a big snow storm, or a wek of rain. We were told that some had already dropped out, though.

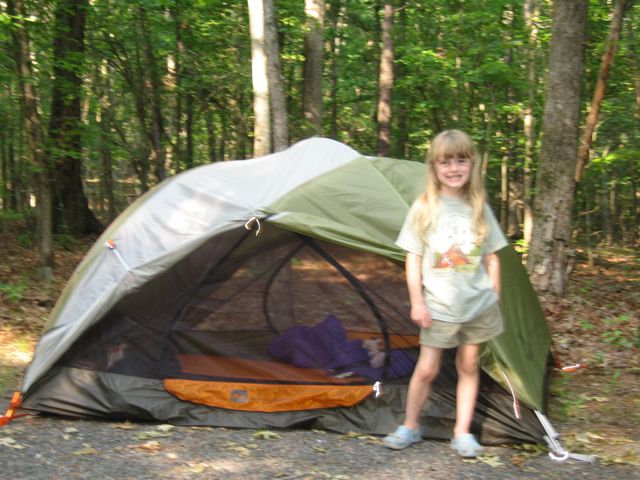
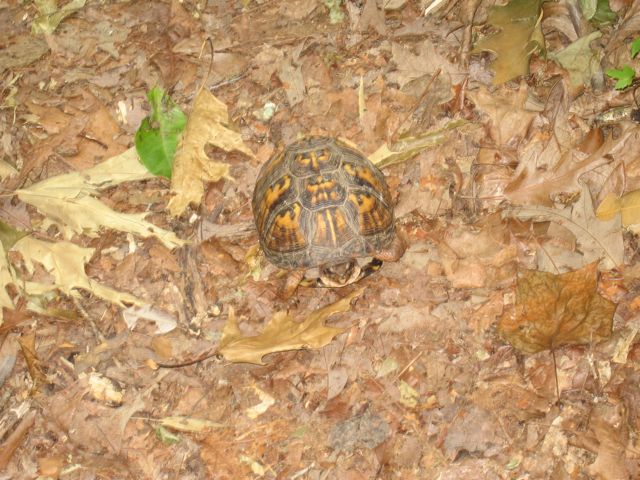
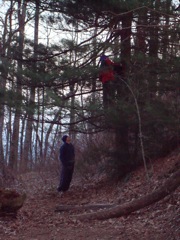
From Neels Gap, we hiked on. And on and on. Most thru-hikers we met were going on to Low Gap Shelter at the farthest, about 11 miles from Neels Gap. We had originally planned on going to Blue Mountain shelter, but it was getting late and we found a nice camping area at the Chattahoochee Gap. I filled up on water from the spring that starts the Chattahoochee River, though to be honest, it was not much more than a mud puddle. :-/ But it was enough for the night, so we cooked, hung our food in a tree (see pictures below), and went to bed in the tent. We did not even get out the rain fly since it was so nice out.

We saw a nice sunset looking through the trees:

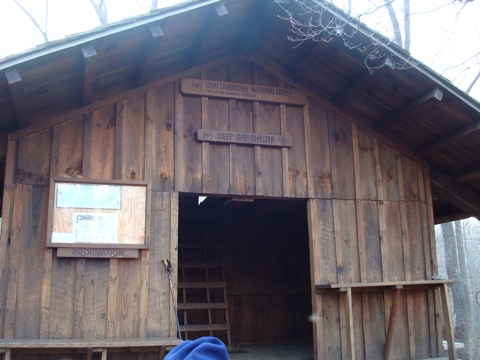
Day 2: Next morning we got up, cooked breakfast (oat meal, coffee for me, tea for Mike, etc.), packed up, and headed out. It was a pretty uneventful day as we hiked 18 miles to Deep Gap. The shelter there was pretty nice, and we had the shelter to ourselves while a father-son duo chose to camp. It was somewhat odd to not be packed this time of year since so many thru-hikers want the shelters. But we were just 3 miles from Dicks Creek Gap, which is where hikers can be picked up and brought into the town of Hiawassee. Many use this town as their 1st off-trail night, where they can stay in a hostel. There is a camp site just 1 mile from that road, so some thru-hikers go there and then hike the mile to the road in the morning.

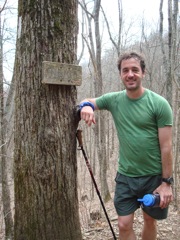
Day 3: We had set our alarm for 6:00 a.m., as the weather report indicated a strong cold front with strong storms would come through later that day. From the hikers on the trail, we got various reports, but most indicated storms would start in the later afternoon or early evening. We wanted to get a jump on the trail and make it to a shelter at a decent time, to ensure we would have a place to stay. Muskrat was 14 miles away, and we figured we could get there by mid-afternoon. Along the way there were some great mountain views, and we past from GA into NC! There was only a poll in a tree and a little wood sign, so that was a bit of a let down:

Just past the border, we passed through Bly Gap, and then had a couple steep climbs — Sharp Tooth and Courthouse Bald, each around 500 feet in less than a half a mile. One more climb and we made it to Muskrat Shelter. There were already 3 guys holding spots in the 8-person shelter. I grabbed one, but we had already talked of moving on to give us a little less mileage the next day and to go to a shelter that may be less crowded. Everyone we had seen today was going to Muskrat! Ethan and Mike came up a few minutes later, and we did decide to move on. We all ate a little, resupplied our water, and started the 5 miles to Standing Indian Shelter. This would put us at 19 miles for the day — a long day, especially after we had just done 18 and 18 the last 2 days!

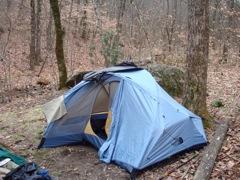
We arrived, and quickly found that Standing Indian was just as crowded, and the shelter was full, so we would have to camp in the storms. We had already decided this would be fine and we’d only have 14 the next day instead of 18… We picked what we thought was the perfect spot — protected by water from a large rock and a large tree. As soon as we started to put up the tent, we found the “sky-lights” of the rain fly had totally disintegrated! We tried to stitch in a plastic garbage bag and re-enforce that with sticks, and then duct tape that from the bottom. Just as we finished eating and hung our food up, it started to rain. And then it started to poor. We quickly realized our patch job was not working as water was dripping in in several places. We worked in our rain jackets between the tent and the rain fly, and that seemed to divert the water away from dripping on us. But then we realized our perfect spot was not perfect at all. The tree roots were holding all the water, and our tent was quickly sitting in 1-2″ of water on one end! We were able to move the tent to a better spot when the rain slowed down, and position all of our rain jackets between the tent and rain fly to divert the water away from dripping into the tent for the most part. Here are a couple pictures of the tent with the garbage bag sewn in:

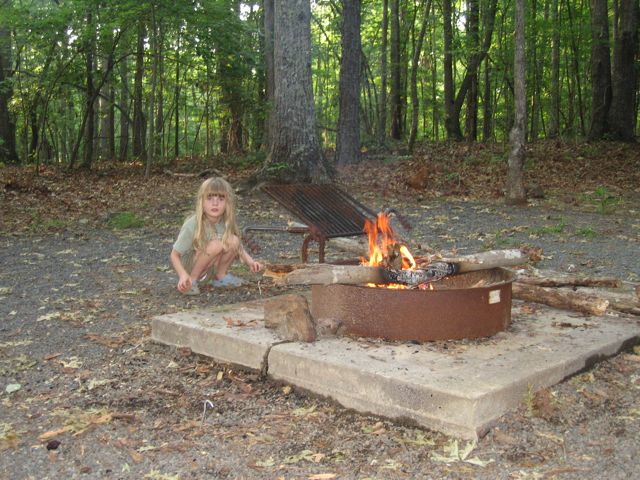
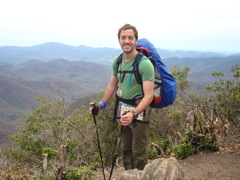
Day 4: In the morning there were on again off again showers, but we finally decided we needed to get up and go. We skipped cooking and just packed up. We made the decision we were probably going to hike the 20 miles out to the car, instead of the 14 to the shelter that would give us only 6 out on Sunday. We had a long climb of about 2 miles up from where we were to the top of Standing Indian which is just under 5500′. The rain cleared up, though it was cooler. We hiked about 7.5 miles to the next shelter, at Carter Gap. It was a wreck! The worst shelter I have seen on the AT yet, and there was all kinds of trash around. I took the time to pick up the trash (which meant carrying it out to the next trash can, which ended up being where the car was parked 13 miles away!) Here is a picture of us eating lunch at the shelter. We had definitely decided to hike all the way out at this point, as my water filter was not working — just a drip or two at a time — so we ended up cooking for lunch which is something we normally don’t do. And I made coffee since I had skipped it in the morning. πŸ™‚

After lunch, we headed out, and immediately saw there was another shelter just on the other side of the trail, and this one was nice! Turns out, the one we were in is quite old. In my opinion, it should probably be torn down! Anyway, we still had 13 miles to go, so we just kept marching along. There were some great mountain views along this section, and the views between roads 83 and 67 were fantastic! There was one point when I looked down through the rhododendron roots to see it was a drop of about 75 feet, onto a rock slope, and down another few hundred feet. If there is ever a washout here, it would be really hard to get around, and pretty hard to re-route the trail!

At the top of this climb is Albert Mountain, about 500 feet up in less than 1/2 a mile! At the top was cool fire tower. We could not get all the way to the top of the tower as it was bolted shut, but we could get to just under the very top on the stairs. I am not afraid of heights, but I got a little vertigo sensation on the last set of stairs as you are literally on the edge of the mountain, and there is nothing you can see below you!

From here, it was basically a 6 mile descent, with only a couple of minor climbs thrown in. It was now that I felt my left knee start to bother me, but boy would it hurt the day after, and now a few days later, it is still a little sore. My right knee, the one that has bothered me the past few years, has had no problems at all!

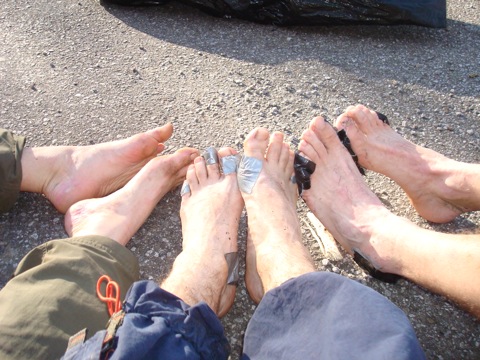
One final shot of our feet at the end of the hike. I had 2 little pieces of duct tape on the inside of my heels that came off with my socks. Both were very tiny blisters, which may be the 1st time in ages I have gotten blisters while hiking.

After that we drove in to Franklin, got a hotel, cleaned up, went to Cody’s and ate way too much food, went back to the hotel and crashed.

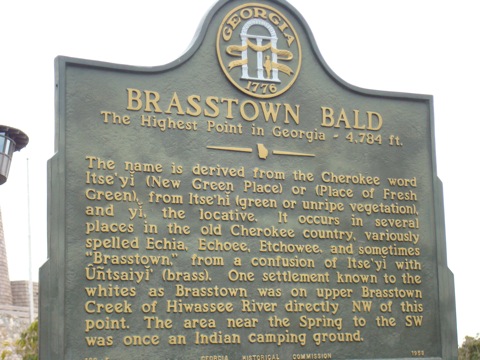
Day 5: The next day we had to go back to Neels Gap to get the other car, and Brasstown Bald was on the way. Ethan is a “high topper,” meaning he is trying to get to the highest points in all 50 states, so we could not pass up Brasstown while being so close. My left knee was killing me on the way up, but I made it eventually, and it hurt even more on the way down!

All in all, another great back packing trip. We were a little aggressive with our mileage to begin with, and that got worse as we pushed it a little harder each day due to the storms and then due to equipment issues. But we made it through, and hopefully my left knee gets back to normal soon!

Here is a link to more pictures.

In the next few days, I am going to post a little more on equipment, exercises I should have done to get in better shape, and food choices…

Long Distance Hiking. Lessons from the Appalachian Trail.

hike.jpg

Roland Mueser. 1998.

I’ve been reading this off and on the past several months, and finally finished it. Overall a good book, though it is starting to be dated in some areas, especially anything that has to do with gear technology.

Roland Mueser hiked the entire trail in the early 90’s, and then surveyed 125+ hikers that also thru-hiked that year after they all had finished, and compiled information on just about every aspect of long distance hiking, especially as related to the AT. Gear, food, sleeping, wildlife, planning, etc…

Much of the book is really good, but gear technology has changed so much, that many sections are definitely out dated now. Clothing, packs, footware, etc. are all much different than 15-20 years ago!

However, reading a book like this definitely makes me want to do the whole thing! I pretty much always have, but reading about it just makes my desire that much stronger. But with my family and job and knees, I doubt it will ever happen, but I can still dream. πŸ™‚

Appalachian Trail Guide: NC – GA and Appalachian Trail Data Book

There are 11 guide books to the AT, and each comes with a couple maps. I carried the map we needed and the guide book on our backpacking trip last weekend. A lot of people say the book is too heavy, and while it is extra weight to carry around, it is well worth it in my opinion. Besides useful information like how far off the main trail each shelter is, or how far water is from a given shelter, there is a lot of historical information as well. And I enjoy reading that kind of stuff while on the trail.

at-nc.jpg

This book just shows the miles between significant features. I did not carry it on the trail, though, since I had the other, more detailed book.

at-data.jpg

AT: Springer Mountain -> Neels Gap

This was my 2nd segment as a sectional through hiker. I now have almost 60 miles out of 2100+ done — still a very long way to go, and at the current rate, I’ll never finish it. I’ll have to step up to go more than once a year, and do more than 2 nights out, so I can knock out a couple 50-100 mile sections! Other than Jeremy’s bloody nose on day 2, and blood sugar/dehydration/heat exhaustion(?) on the way out on day 3, it was an uneventful trip.

The scenary the 1st day or so was not that great — there just weren’t any great views. Part of that was due to cloud cover on top of Springer, and the other part was due to all the trees being full of leaves this time of year. However, Blood Mountain did offer some nice views, and we got to watch the sunset and sunrise from there.

I have already made a list of items I will not carry in the future in order to cut down on weight. At the start, with all of my food and full of water supplies of 130 oz, my load, including my new 3.3 lbs Osprey Atmos 65 pack, was at 36 lbs. I think I can easily cut out 4-5 lbs. And I could have gone with less water, and just filled up more often. One item I will change out is my ancient Petzl duo headlight, and upgrade to a smaller/lighter Petzl tikka. I also want to get my own stove so I can do some solo backpacking, and I really like the jetboil, which weighs just under 1 lbs. I tend to carry too much food, so I will work on that next time. No 13 oz. bag of Combos! (Maybe just 2 small combos bags instead. πŸ™‚ )

People: Sean, Jeremy, Gary, Mike, Ethan

Dates: June 8 -10 2007

Distance: 30.5 (Parking is .9 from Springer, so we hiked up and back down, so we hiked a little further)
Day 1: Springer Mountain – Gooch Mountain Shelter, about 15 miles.
Day 2: Gooch Mountain Shelter – Blood Mountain Shelter, 13 miles
Day 3: Blood Mountain Shelter – Neels Gap, 2.5 miles
Photos: Sharpcast Album

Map: Both Springer Mountain and Neels Gap are on this map:

at-springer.jpg

AT: Iron Mountain Gap β€” > US 19 E

Note: I have now done 2 weekend backpack trips on the Appalachian Trail, so if I am going to become a “sectional thru-hiker” then I figure I should start blogging about it.

This 1st entry is from my 1st trip in April of 2005, when we got caught in blizzard like conditions, complete with white-outs where we couldn’t follow the trail and had to turn back in 60-70 mph winds. The 4 of us set up the 3 man tent and rode out the storm overnight, for 14 hours.

Trip Details

People: Sean, Mike, Jeremy, Gary

Dates: April 2005

Distance: 28.7 miles

Day 1: TN 107, Iron Mountain to Roan Mountain Shelter

Day 2: Roan High Knob Shelter, had to turn back at Bradly Gap as the snow/wind got too bad, slept in a tent somwhere south of there…

Day 3: From just south of Bradley Gap to US 19 E. Had to break snow at least knee deep.

Pictures: Click here for my sharpcast album. Β [ Update 11/20/2012: Β The sharpcast album is long gone so I’ll include a couple shots below…]

Map: Below is a map of the general area… TN 107/Iron Mountain Gap does not show up on this map, but it is north of Spivey’s Gap and South of Roan Mountain.

at-spivey.jpg